Let's talk about color banding, why it happens, how to remove the banding from a sky, subject, or background with useful techniques, and how, when, and why to use grain, surface blur, and noise. These techniques are nothing advanced or demanding so its pretty easy and straightforward to follow, and they can be useful to anyone, especially for people who are just starting this hobby and want to have clean screenshots without any annoying defects before posting them on social media.
This guide will focus on post-processing with Adobe applications rather than in-game with ReShade. If you are interested in ReShade as well, then I recommend also checking the Deband ReShade Shader if you want to try it out which can be helpful for banding as well (especially the ability to apply the effect with the depth buffer, so to only affect the sky with it).
Guide examples below are zoomed hotsampled 20MP shots cropped from 21:9/3:4 aspect ratios to inspect closely the sky for banding, or any other defects, and if there are any, this guide will show you how to solve it.
Banding as our enemy
Color banding is one of the most disturbing defects that you can find in your image. This phenomenon happens in smooth areas with similar shades, for example, a fading gradient (from light to dark), when the abrupt color change cannot be presented accurately. This results in certain colors appearing as bands rather than smoothly transitioning from one hue to another.
For banding to occur, it doesn't need to be the image adjustments, but let's say that they are, the more adjustments you make to a screenshot the higher the chances are for banding to occur.

Example of banding after applying curves adjustment layer on the gradient. You can see it in the form of straight vertical lines. (image example created by me)
So what should appear as a smooth gradient, will instead show straight vertical lines that don't appear to blend well at all. They can appear in different forms of shapes as well.
Not to mention how this case became more evident due to social media websites that apply heavy compression to the images, by further reducing the number of tones available which often results in a mess.
So let's focus now on how to fix this defect, and how I deal with this in general.
But before we get into it, it would be advisable to mention Reshade Shader Toggler Add-on. A tool that allows you to turn off the in-game shaders, which can help you eliminate the present vanilla grain and other annoying effects that can ruin your shot before you even start to apply your own edits. If you are interested, please go here to get to the main release and to see an example of its usage.
There are simple ways to eliminate the banding on a shot fast in Photoshop and Lightroom, specifically in the sky to begin with.
Guide Requirements
Since this is a post-processing guide that happens after you are finished with the in-game photo shooting session, you would need to have Adobe Photoshop or Lightroom installed on your computer.
Photoshop
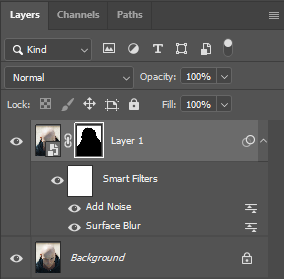
First off, drop your shot into Photoshop and duplicate the background layer by pressing Ctrl + J on PC, or by right-clicking the Background layer > Duplicate layer. Its very important to make sure that you are in 16bit mod by checking Image menu > Mode, and make sure that 16Bits/Channel is selected. Now go to the Filters menu and choose Convert for Smart Filters. This way your duplicated layer becomes a Smart Object and you can work non-destructively.
Go to Select menu > Sky and the AI will make the sky selection for you. You can then use the Quick Selection Tool (W button) for more precise selection if you are not happy with the result e.g. if AI did not make the selection the way you wanted (don't forget to zoom in while doing the precise manual selection by holding Alt + Scroll wheel).
Then we wanna go to Filter menu > Blur > Surface Blur. With the threshold around 19-20 raise the radius slider slowly up to that point until you no longer see the evidence of banding in the small window and press ok.
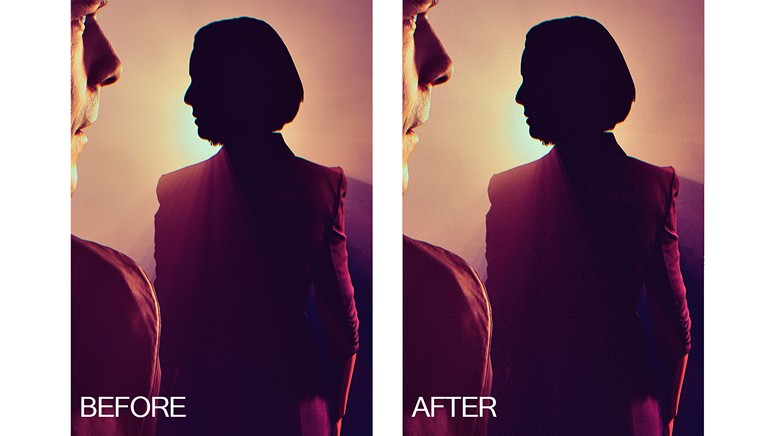
If you see some of the banding defects on the sides, or below the sky on the cloud you can select the main duplicated layer, and use the Quick Selection Tool to select that area while you have the Surface Blur, and Noise as Smart Filters, then press Ctrl + J, and effect will be applied on the new layer. You can go like that as much as you want to heal all of it fast. It's pretty straightforward. Before and After
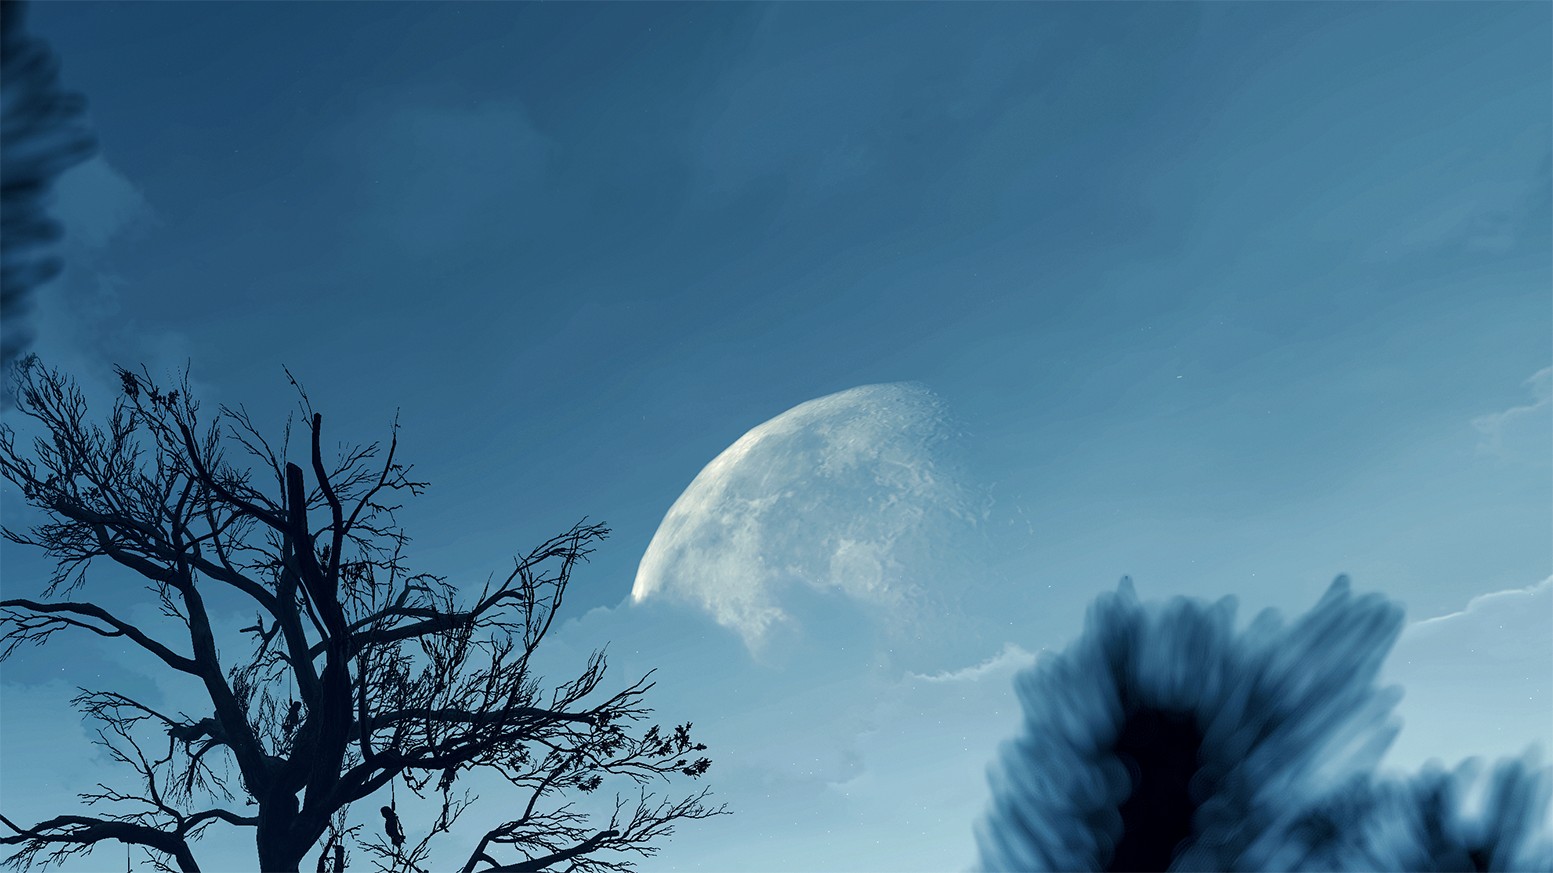
AFTER EDIT

BEFORE EDIT
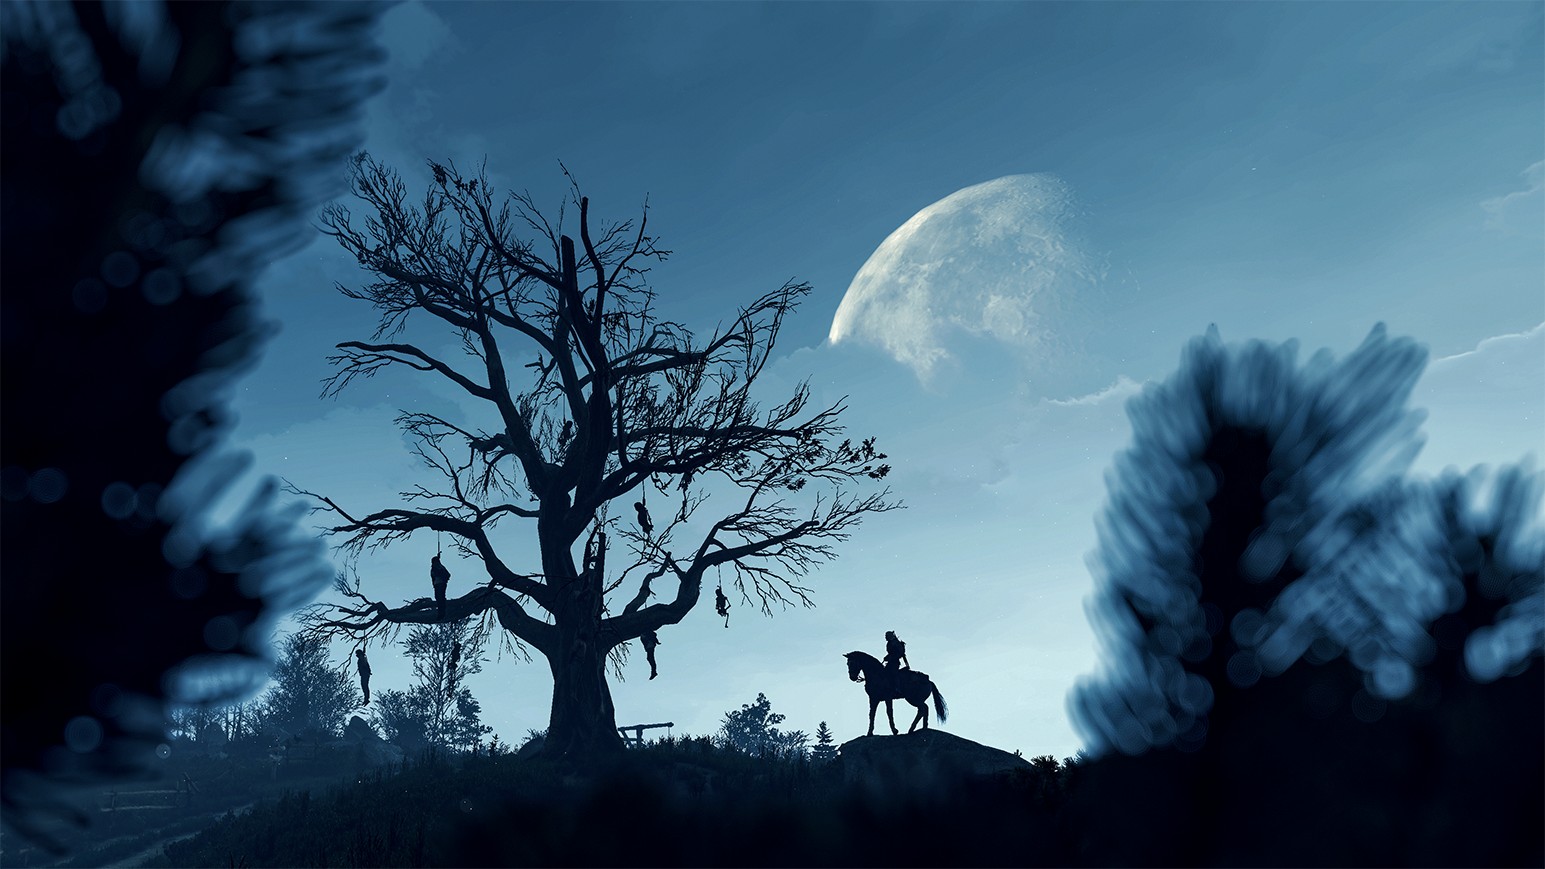
Example of banding in a sky, and result after the surface blur without blurring out rest of the image such as the moon, and other healthy parts of the sky.
Let's go further now with a different example by adding some noise. So after the surface blur you can now apply some noise to it by going to Filter menu > Noise > Add Noise. The percentage of the added noise should be around 2% so you get the idea. Not too much. Leave the options Uniform and Monochromatic checked and go ok.
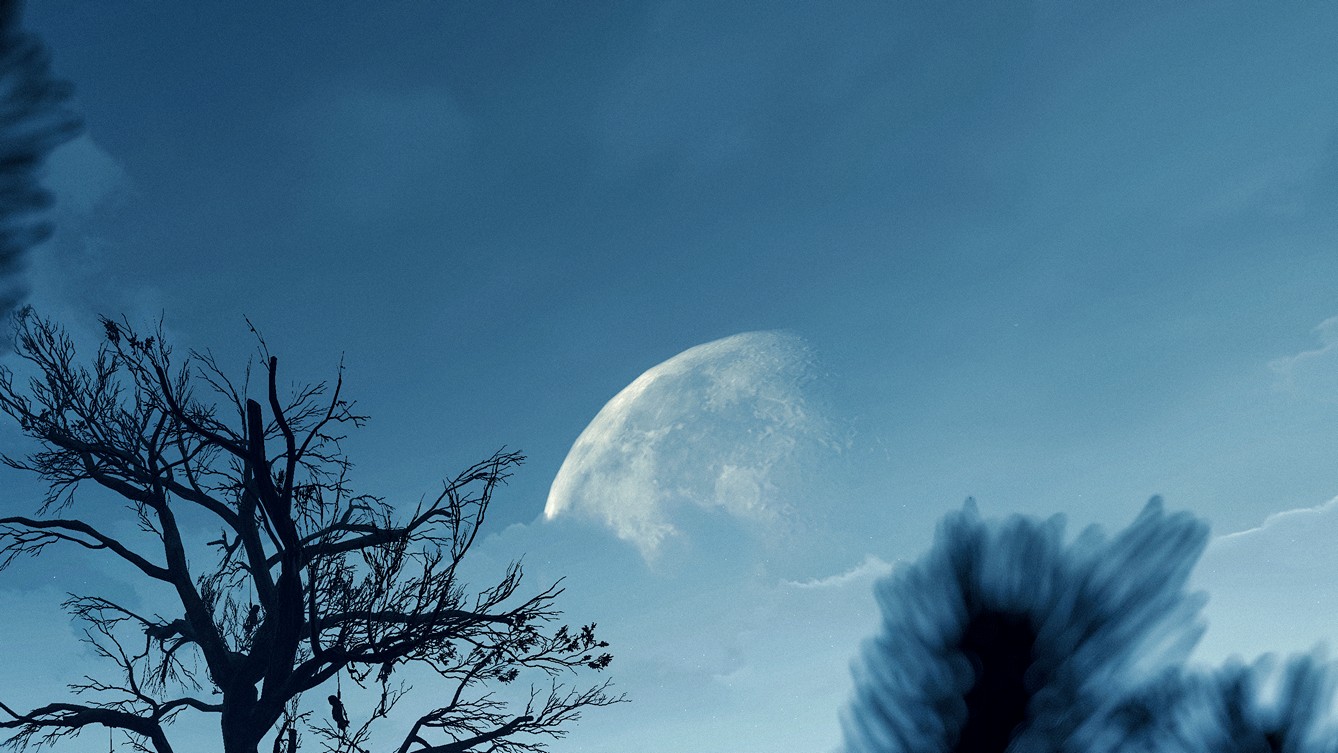
AFTER EDIT

BEFORE EDIT
Sky comparison again, this time with added noise, surface blur with a radius of 10-15, and threshold around 20. No banding.
Lightroom
Similar you can do in Lightroom. After you import a screenshot into Lightroom, press Shift + W on PC or below the histogram click on the circle to add a mask. Click on Select Sky and Lightroom will magically select the sky for you. If you are not happy with the AI selection then while the mask is selected click on Subtract (Subtract from mask With...) and select a brush (to avoid confusion sometimes subtract is only shown as minus, because your Masks window is smaller, and if that's the case, you can enlarge it by clicking the arrows at the top right of Masks window). Use the brush to remove the area of the effect where you don't want the blur to be applied. Make sure to play with brush settings to smooth out the transitions.
Hold Space + Left Click on the image to zoom in and out. If you want to zoom higher go to navigator and pick a percentage, or hold Ctrl +/- (plus/minus) on a PC to go through all existing magnification levels (hitting the Z button takes you to the previously used zoom level, and by hitting Z a second time, it brings you back to the original zoom state). Control the size of the brush with the mouse wheel.
Once done, you can reduce the sharpness, texture, and a bit of clarity of sky, and then add a bit of grain. Just be careful to control the other settings as well if you decide to take out a bit of clarity. Reducing the clarity a lot tends to create unexpected brightness, because you are removing some of the contrast, and it's quite noticeable.
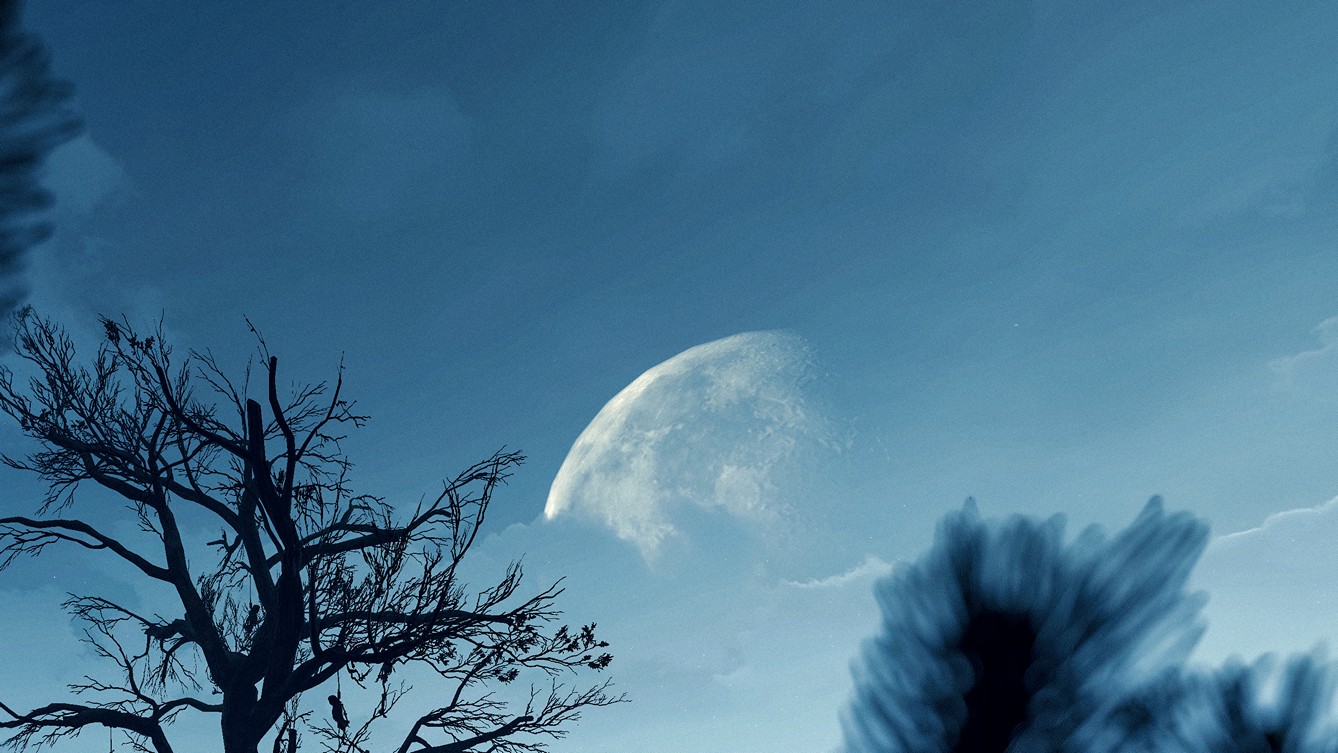
AFTER EDIT
BEFORE EDIT

A comparison of sky, but this time edits are applied in Lightroom with minus texture and added grain around 15 to eliminate the banding.
AFTER MINUS TEXTURE
BEFORE MINUS TEXTURE
Also we can see here that adding only grain didn't help to eliminate the banding entirely, so minus texture did the trick.
Where small adjustments can't help, I push the radius slider to blur the sky quite a bit to ensure I don't see any defects. That would be the case when I decide to shoot older games where the sky transitions and the textures are terrible. Also, sometimes I leave the shot only with surface blur applied. It depends on how I want a shot to look, e.g., a softer look in the image for some particular reason, unless I am forced to add some noise or grain to fight the banding. But, in most cases, I add noise or grain. In general, there are no rules. It's all about your approach and what you want as your final result.
Also, in general, you should add noise or grain to an entire image in the end, unless you want to mask certain areas with it to add more details. In this guide, I used them immediately just to show you an example of their effectiveness against banding.
Just keep in mind that surface blur cannot fix all types of banding, so we will need to add noise or grain on top of that. It's best to combine them anyway.
Different cases
If the banding happens due to some lighting around the subject, we repeat the same process as above for Photoshop, just skip the part where you need to select the sky.
Apply the surface blur and noise on the duplicated layer as mentioned above, and then click back on the background layer, and then we wanna go to Select menu > Subject. You can use the Quick Selection Tool (W button) if needed for more precise selection. Go back to the layer where you applied surface blur and noise, and click on the little icon at the bottom that looks like a camera called layer mask. Now after creating a layer mask, click on it, and press Ctrl + I to invert that mask.
Your layers should look like this:
What that will do is it will isolate the subject from that effect. Lastly, grab a Brush by pressing B on a keyboard, or by picking up the Brush from the left (make sure it’s a black brush) with 100% opacity and 100% flow (by default it should be already), and paint around where you don’t want effects to be applied basically leaving the healthy areas of the image untouched by the surface blur and noise (if its the subject only that you want to be isolated then you don't have to use the brush, you can leave it). You can play with the opacity of the brush and flow to smooth out the transitions.
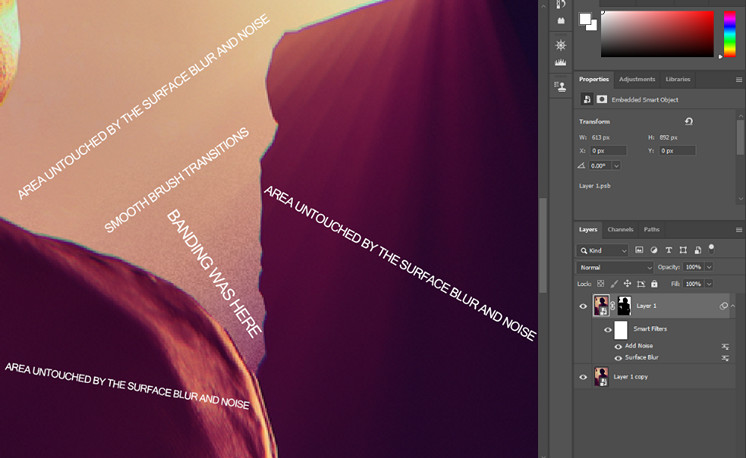
Here you can see an example of how everything is set. In the banding area, there is noise, and surface blur applied to fight the banding while other areas are untouched by the effects.
The same goes for Lightroom, just instead of sky select the background, and repeat the same steps as above with Subtract to Mask, and use brushes to smooth out transitions and play with its settings.
To break this down for Lightroom.
- Example when Lightroom selected entire background.
- Example when I use Subtract to Mask with a Brush to clean the areas I am left with a clean background selected only.
- Example when I used a brush again to remove the background selection to focus only on the color banding area.
- Now you can apply the same edits as mentioned above to remove the banding.
If the banding occurs due to some lightning that bleeds out behind the subject, you can use the Quick Selection Tool from Photoshop to select the banding area.
The selection example in Photoshop should look like this:
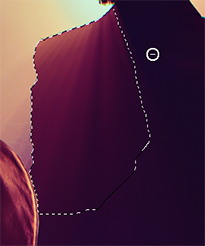
Apply edits as mentioned above to remove the banding and they will only cover the selected area.
In Lightroom, go to Masking (Shift+W) and select a Subject so the AI makes the selection for you. If there are two subjects and banding covers only one, then what you do is Subtract to Mask with a Brush to remove the selection from the other subject.
The final selection example after doing the Subtract to Mask with a Brush in Lightroom looks like this:
Apply edits as mentioned above to remove the banding and they will only cover the selected area.
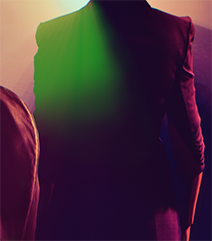
Smoothing out the banding that comes from the lighting which bleeds out behind.
ESGRAN and debanding models
Besides the techniques explained until this point, one could also use "upscaling" models whose output resolution is the same (x1 models) but focus on fixing banding. You can find some of them here. Results may vary depending on the model and the shot, so be sure to experiment a bit by using and mixing different models. You may end up being able to fix very aggressive banding that is impossible to do on Lightroom without a ton of manual editing. However, until we can write a guide about upscaling, ESGRAN, and AI models in general you will have to look up how to use these models on your own.
Using grain, noise and blur to solve color banding
Applying grain to a shot comes down to a personal choice. It is entirely your own individual preference, though I highly recommend it. Adding noise or grain can significantly improve your images.
One of the main fighters against color banding is the grain. As seen above, a bit of grain can help to blend those harsh transitions between the tones. Grain not only can help to eliminate the color banding it can also add a unique special feel and mood to an entire shot, or it can even determine your style. A touch of grain on your shot can add that old-time feel by adding a vintage look to a shot, it can add more details, and it can make a photo look much deeper.
I, personally, don't apply grain when I do processing with ReShade. I like to do it after. Simply put, I want to have the cleanest image possible for various tweaks such as color adjustments, etc. that I do in Lightroom. I don't want to deal with a noisy image in post unless you are already satisfied with the shot result which has a grain on it that was applied from ReShade. A small tip anyway would be to always inspect a shot before moving on.
This is not about me convincing you what to do, because grain is a subjective thing, and its usage depends on what you're aiming for with your content, but it's about how grain can help you against the banding, and how it can improve your shots in general.
The same can be said for the noise and the surface blur. For example, if the image that contains a paper and a pencil looks too smooth it might appear artificial to our eyes, but adding a bit of noise, it will look sharper, and natural to our eyes.
If you need more convincing, no worries! Let's bring up now the final comparison on why I mentioned the grain, noise, and surface blur, and why would you need to use them in the fight against banding.
Can you notice the difference in gradients below?
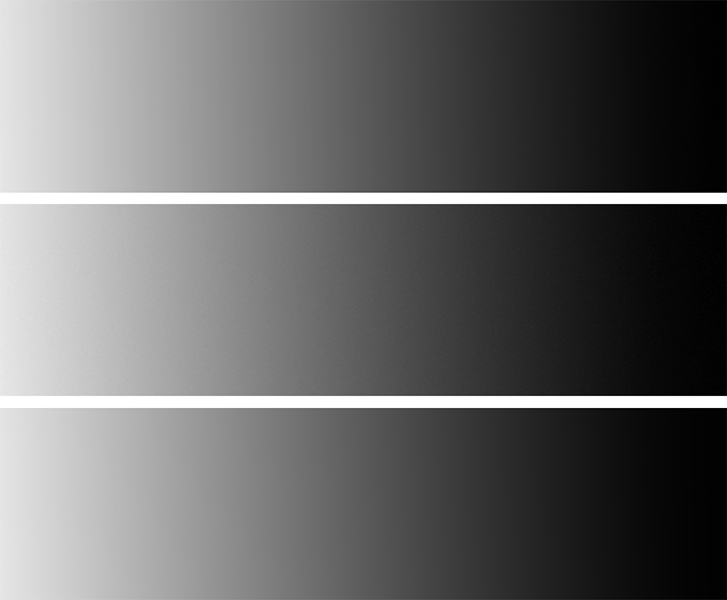
Top: banding example; Middle: 0.58% of added noise to reduce the banding; Bottom: how it looks with surface blur applied only (image example created by me)
Written by StephenCalic(Defaltsiuncula)